

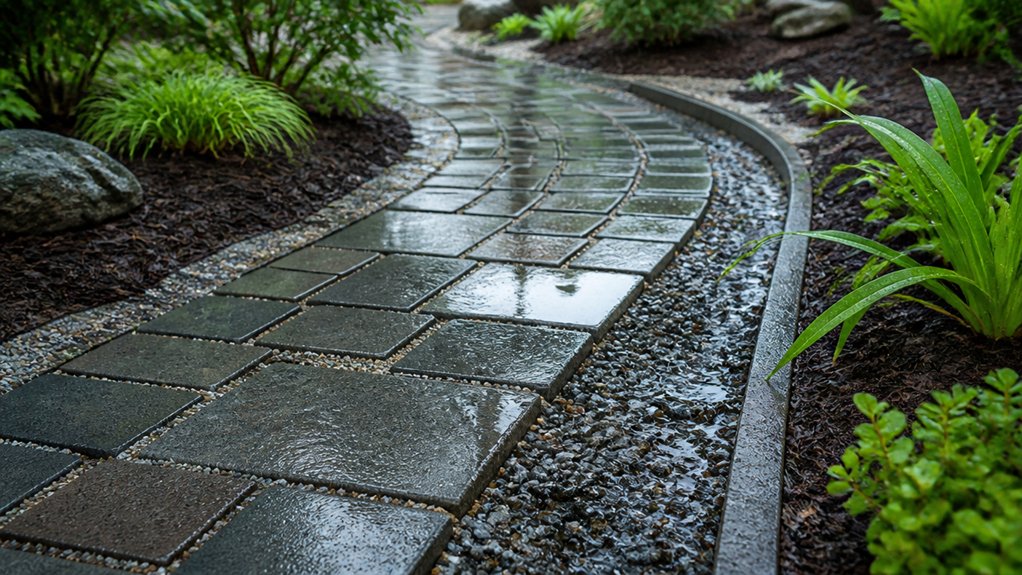
You might think a thicker layer of gravel is enough to keep a garden path firm in wet weather, but does that theory hold on your site’s soil and slope? You’ll get better results when you map runoff, set a 1–2% cross-slope to a defined exit, and build a compacted crushed-stone base over geotextile with locked-in edging. Miss one of those steps, and the failure mode changes—starting where the water actually goes.
Key Takeaways
- Map water flow after rain, then route the path on the highest line with a 1–2% cross-slope to shed water.
- Excavate to firm subgrade, remove organic or pumping soil, and recompact to prevent settling and rutting in wet weather.
- Build a draining base: 3–6 in. angular crushed stone plus 1 in. stone fines, compacted in lifts and graded consistently.
- Use geotextile over clay and consider open-graded aggregate with a perforated drain to daylight where groundwater lingers.
- Install rigid edging pinned every 12–18 in. and keep finished grade 1/2–1 in. high so runoff exits without undermining.
Choose the Best Path Type for Wet Soil
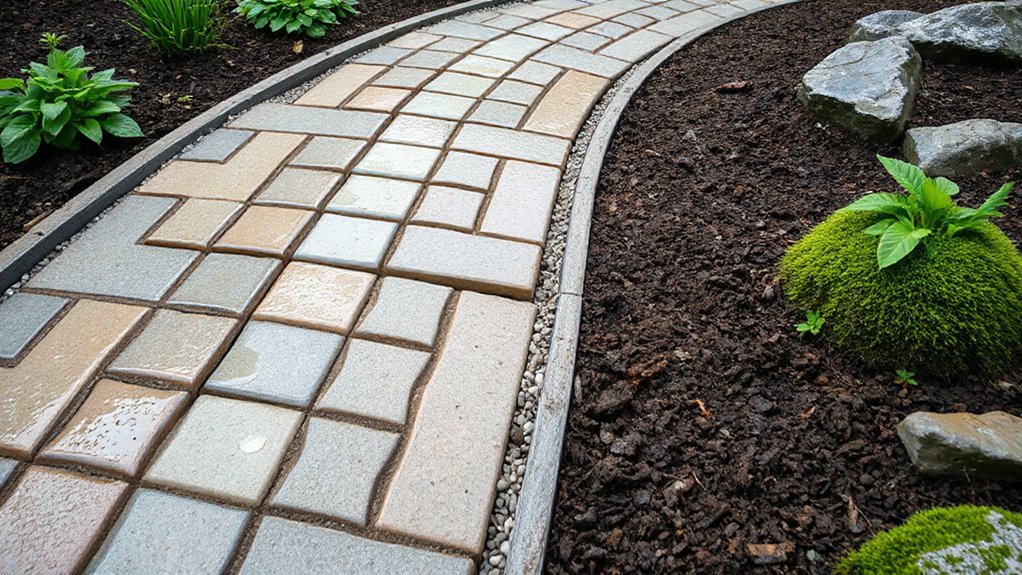
If your site stays saturated after rain, you’ll need a path system that sheds water fast and won’t rut under foot traffic. Start by mapping flow paths: note downspout outlets, low pockets, and any perched water over clay. Set the route along the highest line you can, then plan a 1–2% cross-slope to a discharge area.
Specify a raised profile where groundwater lingers, and reserve at-grade sections for naturally draining loam. Build in soil stabilization by separating subgrade and base with geotextile and compacting in thin lifts.
Use plant integration at edges: deep-rooted, moisture-tolerant grasses or sedges reinforce shoulders, filter sediment, and keep fines from migrating onto the tread surface.
Compare Materials: Gravel vs Pavers vs Stones
Because your path material controls drainage rate, maintenance load, and how the tread behaves under traffic, compare gravel, pavers, and stone by matching each option to your soil type, slope, and expected use.
On flat, poorly draining clay, angular gravel over geotextile and a compacted base sheds water fast, but you’ll rake and top up; Material lifespan depends on edging and base thickness.
On moderate slopes or high foot traffic, concrete or clay pavers on a compacted aggregate base lock together, resist rutting, and simplify snow-shovel use; reset settling units as needed.
For low-traffic, naturalistic routes, set flagstone or stepping stones on a stabilized base; wide joints reduce wobble.
Choose finishes by slip resistance and aesthetic appeal, not color alone.
Trace Runoff and Plan Where Water Exits
Where does stormwater actually go when it hits your proposed path line? You can’t guess—trace it. After a rain, walk the route and flag any puddles, rills, and sheet-flow streaks. If it’s dry, run a hose uphill for 10 minutes and watch the flow lines. Mark high points, low points, and where water concentrates at corners or along edging.
Next, identify discharge points you can control: beds that tolerate moisture, existing swales, or gravel drains—not your neighbor’s fence line. Plan water collection at predictable nodes: downspout splash zones, patio edges, and gate openings. Sketch runoff channels that intercept and redirect flow before it undercuts base layers.
Keep exit paths clear of roots, utilities, and foot traffic too.
Set Path Height and a Gentle Slope
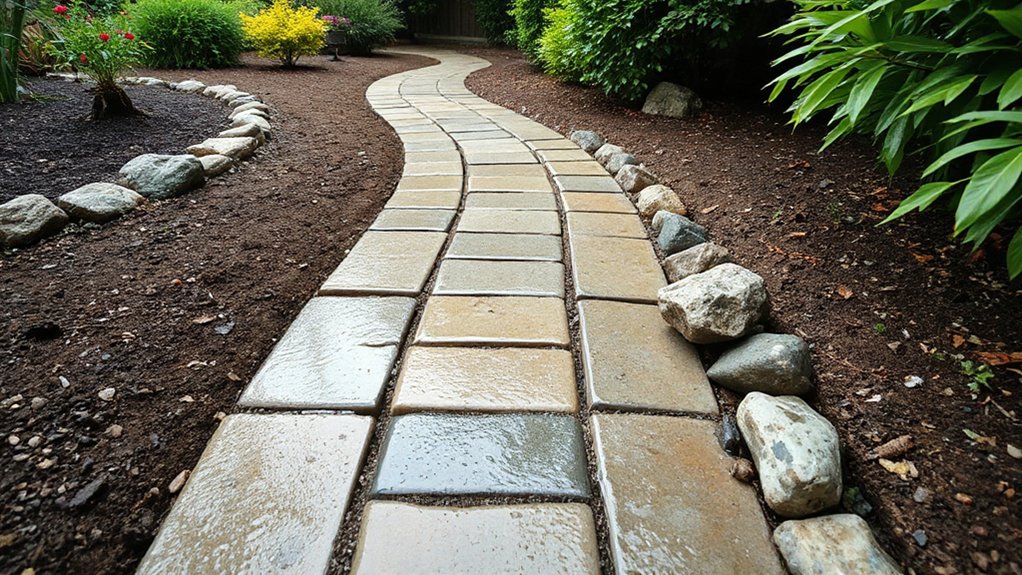
Once you’ve mapped runoff lines, set the finished path height so it sits slightly proud of adjacent soil and sheds water predictably instead of trapping it. Aim for 1/2–1 inch above surrounding grade, adjusting to lawn height or mulch depth so edges don’t become dams.
Establish a gentle cross-slope of 1–2% from the centerline to one side, or crown the path if you want symmetrical drainage and Path aesthetics. Keep the fall consistent through transitions, and verify with a 4–6 ft straightedge and level.
At planting beds, direct runoff toward infiltrating areas and away from foundations; leave a narrow gravel strip for plant integration and to prevent soil splash onto surfacing. Recheck after rain and tweak grades before you lock in borders.
Excavate to the Correct Depth for Your Soil
Next, you’ll excavate based on your site’s drainage: test whether the soil is free-draining sand/gravel, moderate loam, or slow-draining clay, because that controls how much base you need.
Set your target depth by adding surface material thickness plus base and bedding layers, then mark that elevation along the full run with your stringline.
As you dig, strip out any soft, organic, or pumping subgrade and recompact until you’ve got firm, uniform bearing for the path.
Assess Soil Drainage Type
Before you dig, determine how fast your site sheds water so you can set the excavation depth to match your soil’s behavior. Start with a percolation check: dig a 12-inch-wide test hole to planned subgrade, fill it with water, let it drain once to pre-wet, then refill and time the drop per hour. Record results after rainfall too, since perched water can appear over compacted layers.
Next, inspect soil composition in the excavated spoil. Gritty, granular material drains quickly; sticky ribbons and glossy faces indicate clay and high moisture retention. Check for mottling, anaerobic odor, or roots running horizontally—signs of saturation.
Probe for a dense pan with a rod; abrupt refusal means slow drainage and potential pumping under traffic.
Set Base Depth Targets
Because your soil’s percolation rate dictates how much structural support you need underfoot, set your excavation depth from the finished path surface down to the compacted subgrade: aim for a shallow 4–6 in. total build-up (base + bedding) on fast-draining, granular soils.
Increase to 8–12 in. on loams and mixed fills.
Plan 12–18 in. plus geotextile separation and a thicker, well-compacted aggregate base on slow-draining clays or sites that showed perched water or pumping during your test.
Mark finished grade with stringlines, then subtract paver/stone thickness and bedding (typically 1 in.) to get base depth.
Maintain cross-slope (1–2%) as you dig so water exits the surface.
In wet pockets, prioritize deeper, angular aggregate for soil stabilization rather than more bedding sand.
Where plant integration borders the path, keep excavation consistent, but reserve a clean edge trench for root-safe restraints and drainage.
Prevent Soft Subgrade Layers
Where do garden paths usually fail first? Right at the subgrade, where wet soil turns plastic and pumps under foot traffic. You prevent soft layers by excavating to the depth your soil can support, not just to a generic number.
On sandy or gravelly sites, dig until you hit firm, non-yielding material; remove loose pockets and roots.
On clay or silt, go deeper to bypass the seasonal smear zone: typically 6–10 inches below finished grade, then proof-roll with your boots. If it deflects, keep excavating or undercut and replace with angular aggregate.
Maintain positive drainage at 1–2% cross-slope.
Finish with uniform soil compaction in 2–3 inch lifts.
Preserve edges for plant integration by cutting clean lines and isolating roots.
Build a Draining Base: Stone + Fines Layers
Once you’ve excavated and compacted the subgrade, build a draining base by installing two distinct lifts: a structural layer of angular crushed stone and a leveling layer of fines.
Spread 3–6 in. of 3/4-in. minus or #57 stone, matching your soil’s drainage and expected foot traffic. Grade it to a 1–2% cross-slope away from beds, then compact in thin passes with a plate compactor.
Add a 1-in. lift of stone fines (or crusher dust) as a bedding course. Screed it to final elevations, keeping consistent thickness so pavers or gravel don’t rock. Mist lightly to help lock particles, then compact again.
Coordinate Plant selection so roots won’t disrupt edges, and plan Seasonal maintenance to top up fines and recompact low spots. Inspect after storms.
Use Geotextile Fabric to Prevent Sinking
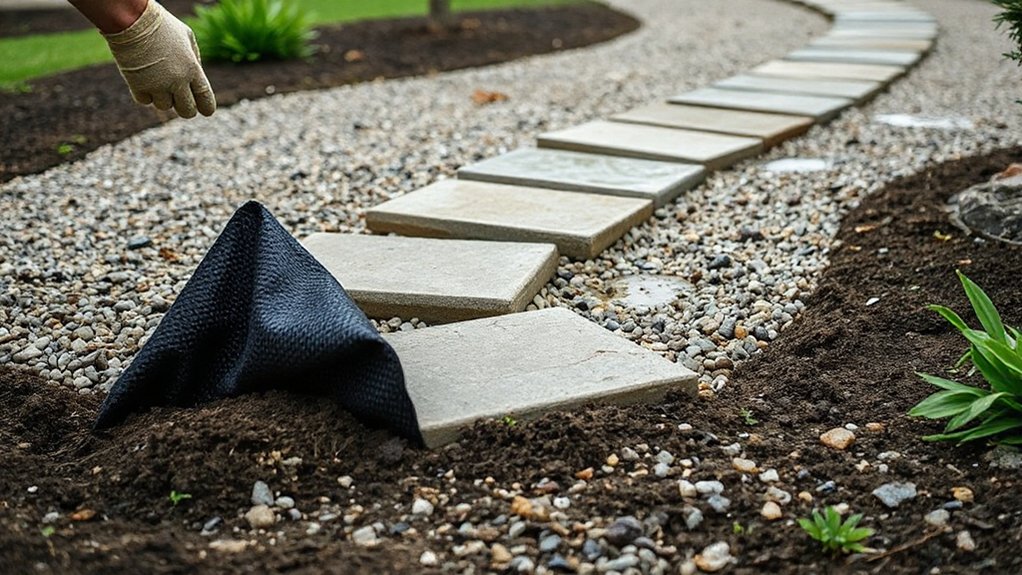
After you’ve shaped and compacted the subgrade, roll out a nonwoven geotextile over the entire path footprint to keep your base stone from migrating into soft, fine-grained soils and to reduce frost-driven pumping.
Overlap seams 12–18 inches, and orient overlaps downslope so runoff can’t peel them back. Cut the fabric tight to the excavation lines, then pin it every 3–4 feet with 6-inch landscape staples, adding extra pins at curves and progressions.
Don’t stretch it; let it lie flat to maintain pore space. This layer delivers soil stabilization by separating fines from your aggregate, preserving base thickness and compaction in saturated conditions.
It also boosts erosion control by filtering water while holding subgrade particles in place under traffic and freeze-thaw cycles.
Install Sturdy Edging to Stop Washout
To stop rain runoff from washing your base course out, you’ll install edging that matches your site conditions and traffic—pressure-treated timber, steel, aluminum, or concrete.
You’ll set the edging to the correct depth so it captures the compacted base and surfacing while staying flush with the finished path grade.
You’ll then anchor it with stakes, spikes, or pins at tight intervals and tie corners and junctions so the line can’t creep under freeze–thaw or saturation.
Choose Durable Edging Materials
Although you can compact base material perfectly, you’ll still lose aggregate at the edges if you don’t lock the path in with durable edging. Choose materials that match your site’s moisture load, traffic, and freeze-thaw cycles so the edge doesn’t heave, rot, or bow.
For Edging styles, prioritize steel or aluminum landscape edging for gravel paths on slopes, because it stays straight and pins tightly. Use concrete curb edging where runoff concentrates, since it resists undercutting.
In shaded, wet zones, avoid untreated wood; if you want Decorative borders, pick dense stone set in mortar or rot-resistant composite boards with galvanized stakes.
On clay soils, select edging with strong anchoring holes or interlocking joints to prevent lateral creep. Match fasteners to the material: stainless near fertilizers, galvanized elsewhere.
Set Proper Edging Depth
Because edging only works when it bears against stable soil, set it deep enough that the top of the edge finishes just below your final path surface (typically 1/4–1/2 in) while the body of the edge is anchored into undisturbed subgrade.
Excavate a narrow trench along the path line, and keep the trench wall vertical so the edging seats tight. In sandy or wet loam, deepen the cut until you reach firm material; this improves soil stabilization and reduces lateral creep during storms.
Check depth at junctions: dips, slopes, and curve apexes need consistent reveal to prevent overflow. Leave room for your base and surfacing thicknesses, not just the pavers.
For plant integration, keep edging slightly lower near beds so mulch can’t wash onto the walking surface.
Anchor Edging Securely
Where does edging usually fail first—at curves and low spots where runoff pushes laterally—so lock it in before you place surface material. Set edging on compacted base, not loose soil, and keep the top edge level to your finished grade.
Drive 10–12 in galvanized spikes or rebar through predrilled holes every 12–18 in, then halve spacing at curves, shifts, and any downslope run. Angle stakes slightly back toward the path to resist outward shear.
Bed the outside face in moist, tamped soil and tie it into the adjacent plant bed so water can’t undercut it. For a decorative border, backfill and compact in 3-in lifts.
Recheck alignment after a heavy rain.
Lay Pavers or Gravel With Proper Compaction
Once your base is graded and edge restraints are set, start placing your pavers or spreading gravel in controlled lifts so the surface locks together under compaction.
For pavers, snap control lines, set units on 1 in bedding sand, and keep joints consistent to support aesthetic design around beds and progressions. Drop each paver, then tap it into plane with a rubber mallet; don’t twist or “wiggle” it.
For gravel, place 2–3 in lifts of angular 3/8–3/4 in stone, rake to grade, and compact each lift with a plate compactor until it stops shifting.
Finish pavers by sweeping jointing sand, compacting, then topping off joints. Confirm elevations match plant compatibility clearances and mower paths.
Check flatness with a 6 ft straightedge.
Add Path Drainage + Fix Common Wet Failures
Even if you’ve compacted the base correctly, water will still exploit low spots and tight soils, so build drainage into the path before the first heavy rain tests it.
Set a 1–2% cross-slope to a swale or drain line, and keep the low edge open, not trapped by edging.
In clay, add a 4–6 inch layer of open-graded aggregate under bedding, then connect it to daylight with a perforated pipe wrapped in geotextile.
Fix failures fast: if pavers pump or rock, pull them, regrade the base, and recompact in lifts.
If gravel ruts, add fines, water lightly, and compact.
In garden design, use plant placement to intercept runoff: place thirsty perennials downslope and keep roots away from subdrains.
Frequently Asked Questions
Do I Need a Permit to Install a Garden Path?
You usually don’t need a permit for a simple garden path, and it won’t derail your weekend. Still, check permitting requirements and local regulations for grading, drainage, easements, and hardscape limits on your specific parcel.
How Much Does a Wet-Weather Garden Path Typically Cost?
You’ll typically spend $10–$40 per sq ft installed, depending on drainage needs, base depth, and labor rates. Cost considerations include geotextile and gravel. Material options: compacted stone, pavers, permeable concrete, boardwalk.
Can I Build a Solid Path Over Existing Grass or Mulch?
Yes—you can, but it’s like building on a sponge. You’ll strip sod, excavate 4–6 inches, compact subgrade, install geotextile, build a crushed-stone path foundation, then add pavers; plan mulch replacement outside edges.
What Are the Best Plants to Border a Path in Soggy Areas?
Choose moisture-tolerant natives: sedges (Carex), rushes (Juncus), iris, and cardinal flower; add ferns in shade. For Plant selection, match sun and soil. For border maintenance, edge yearly, thin clumps, remove debris.
How Do I Keep Moss and Algae From Making the Path Slippery?
Like skating on green velvet, you’ll stop slips by scrubbing weekly and improving drainage. For Moss control, install 4–6 hours sun exposure and brush joints. For algae prevention, apply diluted peroxide, then add grit.

Leave a Reply